With macOS Tahoe, Apple is introducing a new Liquid Glass look for the user interface. This new look involves transparent elements where some sections on screen will be able to show elements layered below them. It gives macOS a fresh, new look. (Or makes it look a little like Windows Vista, if you’ve been using computers long enough to understand that reference.)
If you don’t like the new transparent look or if it affects how well you can see items, there is a way to reduce it, and in some instances, turn it in off alltogether. Here’s how to reduce transparency in macOS Tahoe.
How to reduce transparency in macOS Tahoe
- In System Settings, go to Accessibility in the left column.
- In the main area of the window, look for the Vision section. Select Display.
- Look for the Reduce transparency setting. The default for the switch is off. Flip the switch on to activate this setting.
Note that for whatever reason, Apple decided to make the setting switches very dim in macOS Tahoe. Longtime Mac users know that often, settings that cannot be adjusted are dimmed like this. But in Tahoe, these settings are active, and you can tweak them.
This isn’t a new setting, but it’s far more useful in macOS Tahoe due to the Liquid Glass effect. To give you an idea of how this setting works, here are images of how it affects the menu bar.
Before: Default transparency
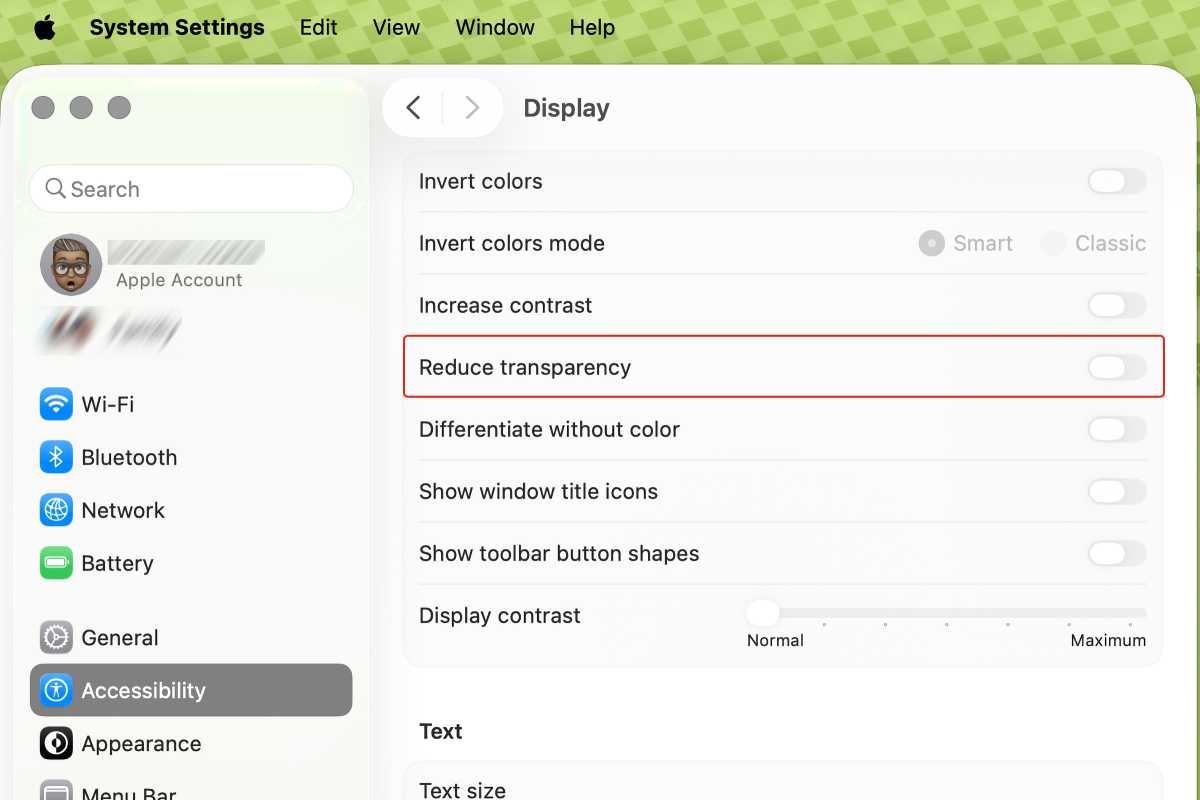
Foundry
After: Reduce transparency
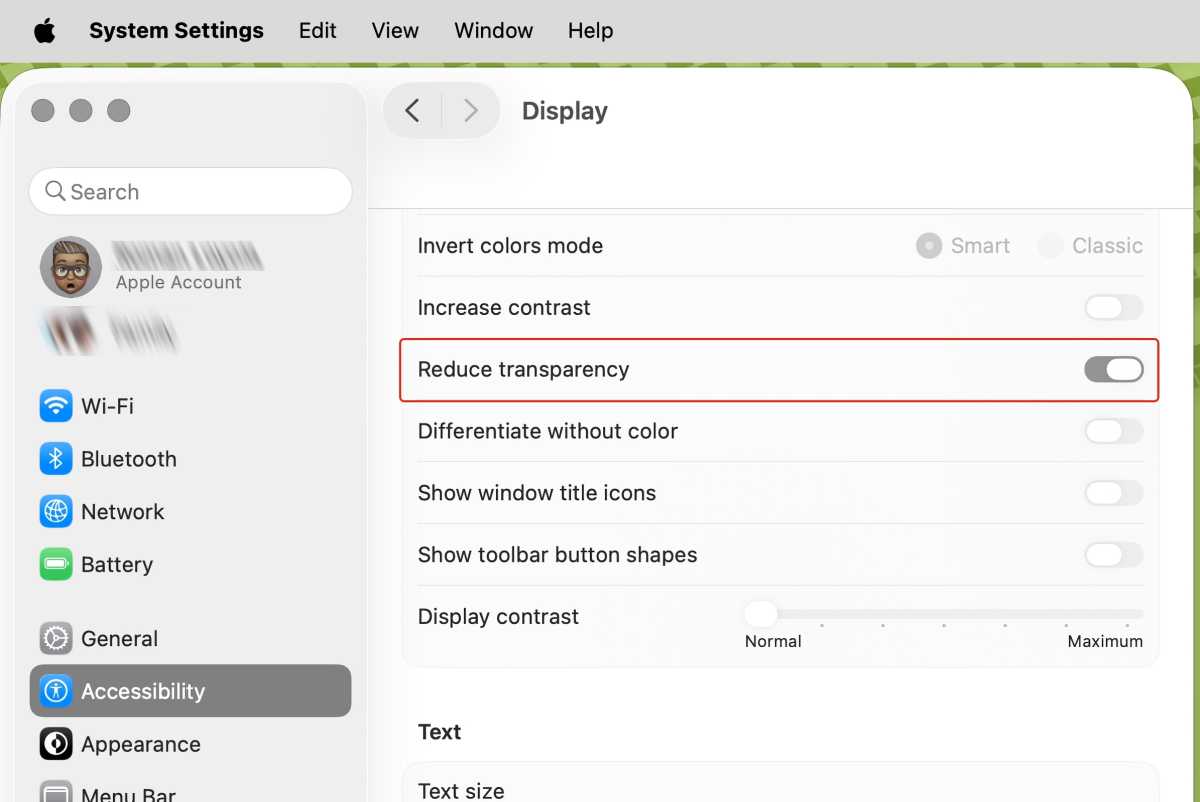
Foundry
Learn more about Apple’s next Mac operating system in our macOS Tahoe superguide. If you’re interested in installing the Tahoe Public Beta before the official release this fall, here’s how to get the macOS Tahoe Public Beta.